Capturing the untamed beauty of wildlife in their natural habitats requires more than just a good camera; it demands meticulous planning, technical expertise, and a deep respect for the animals themselves. This guide delves into the art of wildlife photography, offering practical tips and techniques to help you create stunning images while ensuring the well-being of your subjects and the preservation of their environments.
From pre-trip preparations and essential gear to mastering photographic techniques and ethical considerations, we’ll cover all aspects of this rewarding yet challenging pursuit.
We’ll explore the intricacies of camera settings, composition, and post-processing, equipping you with the knowledge to transform your wildlife photography from snapshots to captivating narratives. Understanding animal behavior, respecting their space, and adhering to responsible photography practices are paramount, and we will discuss these crucial elements in detail. Ultimately, this guide aims to empower you to capture breathtaking images that not only showcase the beauty of wildlife but also promote conservation and appreciation for the natural world.
Planning Your Wildlife Photography Trip
Successful wildlife photography hinges significantly on meticulous pre-trip planning. Thorough preparation ensures you maximize your chances of capturing stunning images while minimizing disruption to the animals and their environment. This involves research, logistical arrangements, and careful consideration of your equipment and its protection.Researching animal behavior and migration patterns is paramount. Understanding when and where animals are most active significantly increases your photographic opportunities.
For instance, knowing the breeding season of a particular bird species will allow you to anticipate their nesting behaviors and photographic possibilities. Similarly, researching migration routes can lead you to prime locations for observing large mammals during their seasonal movements. Websites dedicated to wildlife tracking, scientific publications, and local wildlife guides are invaluable resources for this information.
Obtaining Necessary Permits and Permissions
Securing the necessary permits and permissions is crucial for legal and ethical wildlife photography. Many locations require permits for access, photography, or even just presence within specific areas. These permits often involve fees and stipulations regarding distance from animals, permitted equipment, and photography techniques. The application process varies depending on the location and governing body, but generally requires submitting an application well in advance of your trip.
For example, national parks often have online application portals, while private reserves may require direct contact and a detailed proposal. Failure to obtain the required permits can result in fines or legal action.
Packing List for a Wildlife Photography Expedition
A well-organized packing list is essential for a smooth and successful wildlife photography expedition. Prioritizing gear protection and environmental considerations ensures both the safety of your equipment and the preservation of the natural environment.
- Camera Body and Lenses: Include a robust camera body suitable for the conditions and a selection of lenses catering to diverse wildlife photography situations (e.g., telephoto for distant subjects, wide-angle for landscapes).
- Memory Cards and Batteries: Pack ample memory cards and extra batteries, considering potential power drain in cold or hot weather. Consider using battery grips for extended shooting times.
- Tripod and Monopod: A sturdy tripod is vital for sharp images, especially in low-light conditions. A monopod offers greater mobility while providing some stability.
- Cleaning Kit: Dust and moisture can significantly impact image quality. A blower brush, lens cleaning pen, and microfiber cloths are essential.
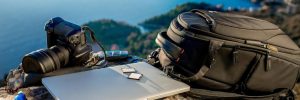
- Protective Gear for Equipment: Rain covers for your camera and lenses, a padded camera bag, and potentially a waterproof backpack are crucial for protecting your investment against the elements.
- Binoculars: Essential for spotting wildlife from a distance and planning your approach.
- Clothing: Pack layers of clothing suitable for varying weather conditions, including waterproof and windproof outerwear. Neutral-colored clothing helps avoid startling wildlife.
- First-Aid Kit: A comprehensive first-aid kit is necessary for minor injuries and unexpected situations.
- Insect Repellent and Sunscreen: Protecting yourself from insects and sun exposure is important, especially in tropical or subtropical environments.
- Reusable Water Bottle and Waste Bags: Minimize your environmental impact by carrying a reusable water bottle and properly disposing of all waste.
Essential Gear and Equipment
Capturing stunning wildlife photographs requires more than just a keen eye; it necessitates the right tools. Choosing the appropriate camera body, lenses, and stabilizing equipment is crucial for achieving sharp, well-exposed images in often challenging natural environments. This section will guide you through selecting the essential gear to enhance your wildlife photography experience.
Camera Bodies and Lenses
The choice of camera body and lens significantly impacts the quality of your wildlife images. For wildlife photography, a camera with a fast autofocus system, high resolution, and good low-light performance is paramount. Full-frame cameras generally offer superior image quality and low-light capabilities compared to crop-sensor cameras, although crop-sensor cameras are often more affordable and lighter. However, the choice depends on your budget and specific needs.Consider these examples: A professional-grade full-frame camera like the Canon EOS R5 or Nikon Z7 II boasts exceptional image quality and rapid autofocus, perfect for capturing fast-moving animals.
These cameras are known for their high megapixel counts (45MP and 45.7MP respectively) and impressive burst shooting capabilities. A more affordable option could be a crop-sensor camera like the Canon EOS 90D or Nikon D500, which offer excellent image quality at a lower price point. These cameras are lighter and more compact, making them suitable for extended hikes.Regarding lenses, telephoto lenses are indispensable for wildlife photography.
A long focal length allows you to capture detailed images of animals from a safe distance, minimizing disturbance. For instance, a 100-400mm lens provides a versatile range, while a longer lens like a 600mm or 800mm is ideal for capturing distant subjects. Consider lenses with image stabilization (IS) or Vibration Reduction (VR) technology to compensate for camera shake, especially when shooting handheld at longer focal lengths.
A high-quality teleconverter can extend the reach of your existing telephoto lens, but it may reduce image quality.
Camera Settings for Wildlife Photography
Mastering camera settings is essential for achieving sharp, well-exposed wildlife images. Aperture, shutter speed, and ISO work together to determine the final image.
Aperture
A wide aperture (low f-number, e.g., f/2.8, f/4) is often preferred for wildlife photography, as it allows for a shallow depth of field, blurring the background and emphasizing the subject. However, a narrower aperture (high f-number, e.g., f/8, f/11) may be necessary in situations with a lot of moving subjects to ensure that the entire subject is in focus.
The optimal aperture depends on the specific situation and desired effect.
Shutter Speed
A fast shutter speed (e.g., 1/500s, 1/1000s or faster) is crucial to freeze the motion of animals, especially when they are moving quickly. Slower shutter speeds can result in blurry images. However, if you’re aiming for a sense of motion blur, a slower shutter speed might be desirable. The required shutter speed will vary depending on the animal’s movement and the desired effect.
ISO
ISO determines the sensitivity of your camera’s sensor to light. Lower ISO values (e.g., ISO 100, ISO 200) produce cleaner images with less noise, but require more light. Higher ISO values (e.g., ISO 1600, ISO 3200) are necessary in low-light conditions, but may introduce more noise into the image. Finding the balance between image quality and noise is important.
Modern cameras often handle higher ISO values very well, minimizing the impact of noise.
Stabilizing Equipment
Sharp images are paramount in wildlife photography, and using a tripod or monopod is often crucial, especially when shooting with long telephoto lenses.
Tripods
A sturdy tripod provides the most stable platform for your camera, minimizing camera shake and allowing for sharp images, even at slow shutter speeds. Choose a tripod that is lightweight yet strong enough to support your camera and lens combination. Consider features like a ball head for easy adjustment and smooth panning. Carbon fiber tripods are lighter and more expensive than aluminum tripods.
A tripod is essential for capturing sharp images in low-light conditions or when using long telephoto lenses.
Monopods
A monopod offers more portability than a tripod, providing some stability while still allowing for more freedom of movement. Monopods are a good option when you need to move quickly and are less concerned about extreme stability. They are particularly useful when hiking or trekking in challenging terrain. A monopod is lighter and easier to carry than a tripod, making it ideal for situations where portability is a priority.
Mastering Wildlife Photography Techniques
Successfully capturing stunning wildlife images requires more than just the right gear; it demands a deep understanding of ethical practices and skillful photographic techniques. This section will explore essential approaches to ensure both the safety and well-being of animals while producing compelling photographs.Ethical Wildlife Photography and Animal WelfareResponsible wildlife photography prioritizes the well-being of animals above all else. Approaching animals should always be done with caution and consideration for their natural behaviors.
Maintaining a safe distance is paramount, avoiding any actions that could stress, disturb, or endanger them. Using natural camouflage and remaining patient are key to capturing authentic moments without causing harm. Never attempt to lure animals with food or make unnatural sounds to attract their attention. Remember, the goal is to observe and document their lives respectfully, not to manipulate or control them.
Composition Techniques for Wildlife Photography
Effective composition is crucial for creating impactful wildlife photographs. Several established techniques can elevate your images from snapshots to works of art. Understanding and applying these principles will significantly improve the visual appeal and storytelling potential of your photographs.The rule of thirds, a fundamental compositional guideline, suggests placing key elements off-center, aligning them with the imaginary lines that divide the frame into thirds both horizontally and vertically.
This creates a more dynamic and visually engaging image than simply centering the subject. For example, a majestic lion resting in the savannah would be more impactful positioned slightly off-center, perhaps in the lower right third, allowing for more visual space around it.Leading lines, such as a winding river or a path through a forest, can guide the viewer’s eye towards the subject, adding depth and context to the image.
Imagine a herd of elephants walking along a riverbank; the river itself acts as a leading line, drawing the viewer’s attention to the elephants and creating a sense of movement and journey.Negative space, the area surrounding the subject, plays a vital role in creating balance and emphasis. By strategically incorporating negative space, you can highlight the subject and create a feeling of isolation or vastness.
A solitary wolf howling at the moon against a vast, open sky is a perfect example of how negative space enhances the image’s impact.
Camouflage and Concealment Techniques
Patience and strategic positioning are crucial for getting close to wildlife without disturbing them. Employing camouflage and concealment techniques significantly increases your chances of capturing intimate and natural moments.
- Choosing the Right Clothing: Neutral-colored clothing that blends with the environment is essential. Avoid bright colors or patterns that might attract attention. Earth tones such as browns, greens, and grays are ideal.
- Using Blinds or Hides: Pre-built blinds or self-made hides provide excellent concealment. These structures allow you to remain hidden while animals go about their natural activities. A simple blind could be constructed using natural materials like branches and leaves to blend seamlessly with the surroundings.
- Utilizing Natural Cover: Utilize existing natural cover, such as rocks, bushes, or trees, to shield yourself from view. Patience is key; allow the animals to acclimate to your presence and continue with their natural behavior before attempting any photography.
- Scent Control: Animals possess a heightened sense of smell. Minimize your scent by using unscented detergents and lotions, and avoid wearing strong perfumes or colognes. Wind direction is also important; position yourself downwind of the animals to minimize the chances of them detecting your presence.
- Movement and Posture: Minimize your movements. Slow, deliberate movements are less likely to alert animals than sudden or jerky movements. Maintain a low profile, avoiding standing tall or making yourself a conspicuous target.
Post-Processing and Editing
Post-processing is a crucial step in wildlife photography, transforming raw captures into compelling images. It allows you to refine your work, enhancing details and correcting imperfections that might be present in the original file. However, ethical considerations are paramount; maintaining the natural integrity of the scene is vital, avoiding unrealistic or misleading alterations.The process involves several key techniques, applied strategically to achieve a balanced and aesthetically pleasing result.
Over-editing can detract from the natural beauty of the subject, making it appear artificial. Therefore, a subtle and measured approach is essential.
Sharpening Techniques
Sharpening enhances the details and definition within an image, particularly useful for bringing out the textures of fur, feathers, or scales. Many image editing software packages offer various sharpening tools, including unsharp masking, which works by increasing the contrast at the edges of details. A common approach involves applying sharpening subtly to avoid introducing halos or artifacts around the edges of subjects.
For instance, applying a slight unsharp mask to a photograph of a lion’s mane will bring out the individual hairs, enhancing the overall texture and realism of the image. It’s crucial to adjust the amount, radius, and threshold settings carefully to avoid over-sharpening.
Noise Reduction Strategies
Noise, often appearing as grain or speckles, is a common issue in wildlife photography, especially in low-light situations or when using high ISO settings. Noise reduction techniques help to minimize the appearance of noise without sacrificing too much detail. Many software programs offer noise reduction algorithms, which selectively reduce noise while preserving fine details. For example, in a night shot of an owl, noise reduction can help clean up the background while retaining the detail in the owl’s feathers.
Different algorithms work better for different types of noise, so experimenting to find the best fit for a specific image is recommended.
Color Correction and Enhancement
Color correction aims to achieve accurate and natural colors, correcting any color casts or imbalances present in the image. White balance adjustments are essential to ensure accurate color temperature, which can be affected by lighting conditions. For instance, correcting a color cast from an overcast day can make the colors in a photograph of a hummingbird appear more vibrant and true-to-life.
Color enhancement can subtly boost saturation and contrast to increase the visual appeal, but it’s important to avoid over-saturation, which can lead to an unnatural look.
Workflow for Efficient Processing
Efficiently processing a large number of wildlife photographs requires a well-organized workflow. Begin by culling images, selecting only the best shots for further processing. Then, apply consistent edits across all selected images. This might involve batch processing for basic adjustments like white balance and exposure correction. Next, focus on individual images, applying more specific techniques like sharpening, noise reduction, and color correction.
Finally, organize the processed images using a consistent file naming convention and folder structure to facilitate easy retrieval and sharing. Employing non-destructive editing ensures that the original image remains untouched, allowing for adjustments later without losing quality. This structured approach ensures a manageable and efficient post-processing experience, allowing you to focus on enhancing the quality of your wildlife images without being overwhelmed by the volume.
Travel Tips and Considerations

Planning a wildlife photography trip requires meticulous preparation beyond just gear and technique. Efficient packing, appropriate insurance, and a strong focus on safety and responsible travel are crucial for a successful and enjoyable expedition. This section addresses practical travel tips and considerations to help you navigate the logistics and ethical aspects of your wildlife photography adventure.
Packing and Logistics for Wildlife Photography Trips
Careful packing is essential for minimizing weight and maximizing efficiency. Overpacking can lead to discomfort and hinder your mobility, particularly when trekking in challenging terrains. Consider the climate and conditions of your destination, selecting versatile clothing layers suitable for varying temperatures and weather conditions.
- Pack lightweight, quick-drying clothing items to reduce bulk and allow for easy washing and drying.
- Utilize packing cubes to organize your gear and compress clothing, maximizing space in your luggage.
- Invest in a sturdy, comfortable backpack designed for carrying photography equipment, ensuring proper weight distribution to prevent strain.
- Bring a portable power bank to charge your electronic devices in remote locations where power outlets may be scarce.
- Include a first-aid kit with essentials for minor injuries and any personal medications.
Travel Insurance for Wildlife Photography Expeditions
Comprehensive travel insurance is paramount for wildlife photography trips. Standard travel insurance policies often lack sufficient coverage for specific risks associated with wildlife photography, such as equipment damage, medical emergencies in remote areas, and trip cancellations due to unforeseen circumstances.
- Look for policies that cover the replacement or repair of expensive photography equipment, including lenses and cameras, in case of accidental damage or theft.
- Ensure the policy includes comprehensive medical coverage, especially if traveling to regions with limited medical facilities, including evacuation costs.
- Check for coverage related to trip cancellations or interruptions due to unforeseen events such as natural disasters or political instability, which can significantly impact your photography trip.
- Consider adding coverage for lost or delayed baggage, which can be particularly problematic if essential photography gear is involved.
- Research reputable travel insurance providers specializing in adventure travel and wildlife photography expeditions.
Safety and Responsible Travel Practices for Wildlife Photographers
Prioritizing safety and practicing responsible tourism are crucial aspects of wildlife photography. Respecting wildlife and their habitats is paramount, ensuring minimal disturbance and adhering to ethical guidelines. Safety precautions should include awareness of potential hazards and preparation for unexpected situations.
- Research your destination thoroughly, understanding potential risks like wildlife encounters, weather conditions, and local laws and regulations.
- Inform someone of your itinerary and expected return, providing regular updates during your trip.
- Never approach or attempt to interact with wildlife directly; maintain a safe distance and respect their natural behavior.
- Avoid using flash photography, which can disturb animals, particularly nocturnal species.
- Leave no trace; pack out all trash and avoid disturbing the natural environment.
Exploring Related Topics
Expanding on the practical aspects of wildlife photography, let’s delve into related areas crucial for a successful and responsible photographic journey. This section explores visa requirements, urban wildlife photography, vacation package options, dedicated wildlife photography programs, and the role of venture capital in conservation.
Travel Visa Requirements for Wildlife Photography Destinations
Planning international wildlife photography trips necessitates understanding visa regulations. Different countries have varying requirements depending on your nationality and the purpose of your visit. The following table provides a simplified comparison, but it’s crucial to verify the most up-to-date information with the relevant embassy or consulate before your trip. Note that this is a simplified overview and specific requirements can change.
| Country | Visa Type (Example) | Typical Requirements | Processing Time (Estimate) |
|---|---|---|---|
| Costa Rica | Tourist Visa | Passport valid for at least six months beyond travel dates, proof of onward travel, sufficient funds | Several weeks |
| Tanzania | Tourist Visa | Passport valid for at least six months beyond travel dates, visa application form, passport photos, proof of accommodation and flight bookings | A few days to several weeks |
| Kenya | Tourist Visa | Passport valid for at least six months beyond travel dates, completed visa application form, a recent passport photo | A few days to several weeks |
| Botswana | Tourist Visa | Passport valid for at least six months beyond travel dates, proof of onward travel, sufficient funds, completed application form | Several weeks |
Urban Wildlife Photography Itinerary: A City Escape
This sample itinerary focuses on wildlife photography within an urban environment, showcasing the unexpected opportunities available in cities. This itinerary is adaptable to various cities with significant green spaces and diverse wildlife.
Day 1: Morning – Explore a local park known for birdwatching, focusing on capturing images of common urban birds. Afternoon – Visit a botanical garden or zoo, concentrating on capturing detailed shots of specific animals and plants. Evening – Photograph nocturnal animals, such as bats or raccoons, using appropriate lighting techniques.
Day 2: Morning – Photograph wildlife near a river or lake, focusing on capturing waterbirds. Afternoon – Explore a city’s green spaces, such as community gardens or urban farms, looking for insects and small mammals. Evening – Explore a local market, focusing on photographing interactions between people and animals, such as street vendors selling pet supplies.
Day 3: Morning – Visit a wildlife rehabilitation center or sanctuary, capturing images of animals under care. Afternoon – Photograph wildlife in a less-visited part of the city, such as a nature reserve or abandoned lot. Evening – Review and edit the day’s photographs.
Wildlife Photography Vacation Packages
Several tour operators offer specialized packages catering to wildlife photographers. These packages often include guided tours, accommodation, transportation, and equipment rental. Below is a sample of potential packages. Note that prices are estimates and can vary greatly based on location, season, and specific inclusions.
| Package Name | Destination | Duration | Price (Estimate) | Services Included |
|---|---|---|---|---|
| African Safari Adventure | Tanzania | 7 days | $5000 | Accommodation, guided tours, transportation, park fees |
| Costa Rican Rainforest Expedition | Costa Rica | 5 days | $3500 | Accommodation, guided tours, transportation, park fees, equipment rental |
| Amazonian Wildlife Encounter | Brazil | 10 days | $7000 | Accommodation, guided tours, transportation, park fees, expert photography workshops |
Wildlife Photography Workshop and Guided Tours Program
This program caters to wildlife photography enthusiasts of all skill levels. It combines guided tours to prime wildlife locations with intensive workshops focusing on specific photography techniques. The program may include pre-trip briefings covering gear preparation and ethical considerations, followed by daily guided excursions with professional photographers providing on-site instruction and feedback. Post-trip image review sessions and editing workshops could further enhance participants’ skills.
The program would emphasize ethical wildlife photography practices and responsible tourism.
Venture Capital and Wildlife Conservation Through Photography
Venture capital can play a significant role in supporting wildlife conservation initiatives by investing in photography-based projects. For example, a venture capital firm might invest in a start-up developing innovative camera trap technology for monitoring endangered species. Another potential investment area is supporting photographers who create compelling visual content to raise awareness and drive donations for conservation efforts.
By showcasing the beauty and vulnerability of wildlife through high-quality photography, these projects can attract greater public support and funding for conservation initiatives. The financial returns for venture capitalists could be tied to the success of the conservation project, creating a mutually beneficial relationship.
Wildlife photography is a journey of patience, skill, and respect. By combining careful planning, technical proficiency, and an ethical approach, you can create unforgettable images that celebrate the wonders of the natural world. Remember, the most rewarding photographs are not just aesthetically pleasing; they are also a testament to your commitment to responsible wildlife conservation. Embrace the challenge, respect the animals, and let your passion for nature guide your lens to capture moments of wild beauty that will resonate for years to come.
FAQ Explained
What is the best time of day to photograph wildlife?
The “golden hours,” shortly after sunrise and before sunset, offer soft, diffused light ideal for wildlife photography. These times also tend to be when animals are most active.
How do I avoid disturbing wildlife while photographing them?
Maintain a safe distance, use camouflage, avoid making sudden movements, and never use flash excessively. Observe animals from a distance and respect their natural behavior.
What kind of insurance should I get for a wildlife photography trip?
Travel insurance should include medical evacuation coverage, equipment damage/loss, and trip cancellation insurance. Specialized policies for adventure travel or photographers may offer additional benefits.
What are some ethical considerations in wildlife photography?
Prioritize the animal’s well-being. Avoid actions that could stress, injure, or disrupt their natural behavior. Never entice or bait animals for a better shot. Obtain necessary permits and respect local regulations.